Audi A3 Ignition Starter Switch Replacement
Article Date: 01/06/20
DISCLAIMER
I use affiliate links when writing articles for my website, they help pay my fees. I've provided links relevant to the content of this page. If you are purchasing an item, I'd appreciate you using my links to help support this website. I get paid a small commission just by you making a purchase. Consider the price you'd pay for a garage to do the work for you, versus the price of doing it yourself buying one of my documents. I appreciate all the support, the photos are 480x360, I have the originals but don't upload them to save space and prevent people taking credit for my work. If you are stuck and need to view a full size photo, please drop me an email (admin@andrewhope.co.uk) and I can supply to you. Although I think the below should be enough. I take no responsibility for any damage done to your vehicle.
Tools you will need to replace the Ignition Starter Switch in an Audi A3 Sportback
These are the tools I used doing it my method. If you want to replace the wiring connector this may involve dropping electronics or removing bolts. This is why I didn't touch it. Most electronic errors are down to sensor failure rather than wiring. So I opted for this approach first
- 8mm Nut Driver or 8mm Socket on 1/4" Ratchet
- 10mm Spanner
- T25 Torx
- 2 x Small Thin Blade Screwdriver(s)
Here is a nice little 46 piece 1/4" Socket Set on eBay for £12.39 - it contains the tools you need to access the switch. Pair that with this set of precision screwdrivers for £4.60 and you should have all the tools you need
How hard is it, and how long will it take to replace the Ignition Starter Switch
- Difficulty 1/5 - I estimate it will take about 30-45 mins for the average DIY person to do this task including VCDS. Just as a note, you don't need VCDS except to clear the fault codes. You can perform the fix, but you'd still need to clear the fault codes. It took me about 2.5 hours because I was taking photos and doing it slowly. I have never done this before and given that there's delicate electronics behind the steering column I wanted to do it in a methodical approach. It actually took me longer to get out the switch, but I think I could do this in about 20 mins now if I needed to do it again because I know what you do.
Parts required to replace the Ignition Starter Switch
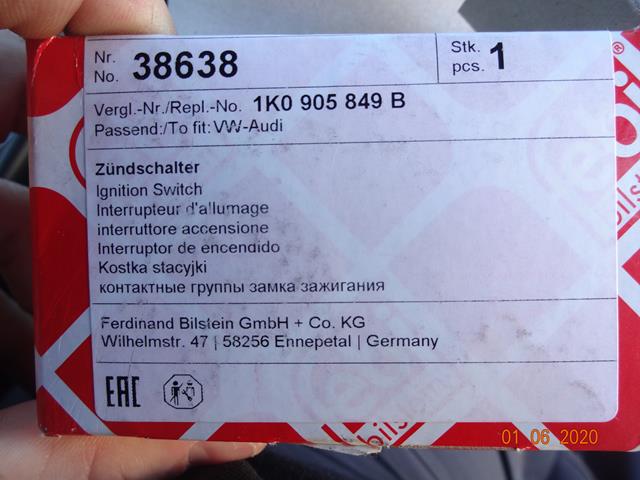
The OEM Part number for this product is 1K0905849B - Buy it on eBay for £11.45, then follow this guide to repair your car. There are other variations on the part when you search it. It's an OEM equivalent part made by Febi Blistein certified to OEM Spec and comes with the adapter cable for replacing earlier part numbers. If you want to buy it directly from Volkswagen/Audi, you will most likely need to order from their parts department, or TPS Online - The OEM price @ TPS was £49.61
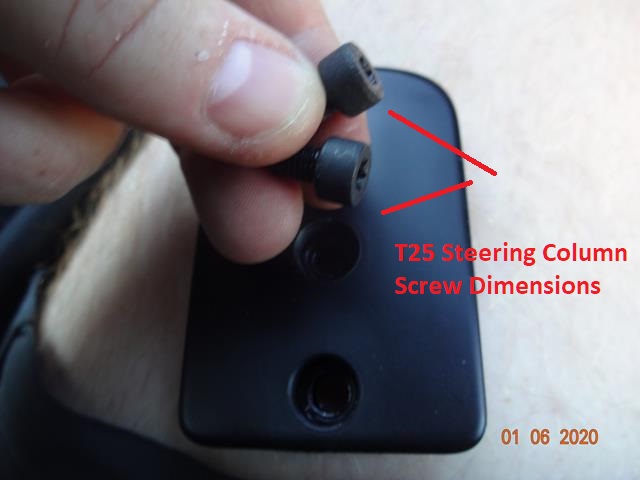
If you manage to loose any of the screws (most likely the T25 for the steering wheel covers since they're so bloody small and awkward!), here are all the part numbers
- 8mm Hex (Lower Trim Cover) - OEM Part TBC
- T25 Torx (Behind Steering Wheel) - OEM Part TBC
- T25 Torx (Steering Wheel Adjustment Handle) - OEM Part TBC
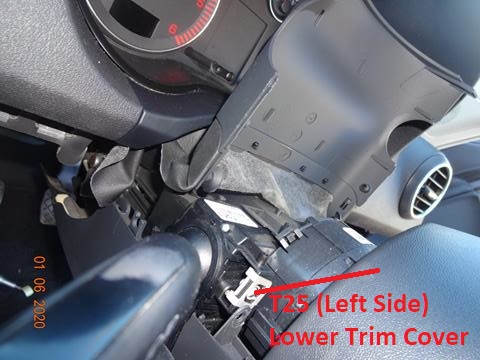
- T25 Torx (Lower Steering Wheel Trim) - OEM Part TBC
Symptoms of a faulty ignition starter switch
Some of the symptoms you can get are below, they should help you identify if you have a fault. It's better to fix it sooner rather than later, better fix it than have the vehicle potentially die when driving
- Your radio CD player will keep switching off randomly when driving
- Your radio CD player will stay switched on when you take the keys out of the ignition
- You won't get an audible alarm if you leave the indicators on without any keys in the ignition
- Your car stalls when driving
- Car not starting, starter motor clicking when turning keys
- VCDS Scan Errors - Group 16: Steering Wheel (Possible Message - 1 Fault Found: 00883 - Ignition Switch (D) Terminal S - 012 - Electrical Fault in Circuit - Intermittent)
- VCDS Scan Errors - Group 46: Central Convenience (Possible Message - 1 Fault Found: 00849 - S-contact at Ignition/Starter Switch (D) - 008 - Implausible Signal)
NOTES BEFORE ARTICLE
This is how I did it, the factory procedure is a bit shorter, but I did what worked for me to fix the problem
I didn't use the adapter cable and replace the loom. Usually electrical problems with cars now are more sensor related than wiring. I wanted to disturb the steering wheel as little as possible as it leaves more potential for other things to go wrong. If you want to do it, that's your choice. I've added this detail into the article later on for you to decide. Although I can't give you the steps to do this. Looking at the wiring, I think you have to drop the control box under the steering wheel and possibly plug the cables into the ignition somewhere.
Online catalogues describe the part as Electronic module for steering column combination switch, the part I'm referring to has part number 1K0959653C / 8P0953549F if you need to identify it. It appears to be the electronics circuitry that controls the cruise control. This is just a note however for anyone who wants to replace the entire assembly. I prefer the K.I.S.S principle. I'd rather only replace it if I know it's broken
Also - I made a video, you may want to quickly watch it so the points below in my guide make more sense
How to replace the ignition starter switch in Audi A3 Sportback
Make sure you have your Radio Code first if it needs one - then pop up car bonnet, disconnect the negative battery terminal with a 10mm Socket/Spanner (I also wrapped a towel around to prevent accidental earth)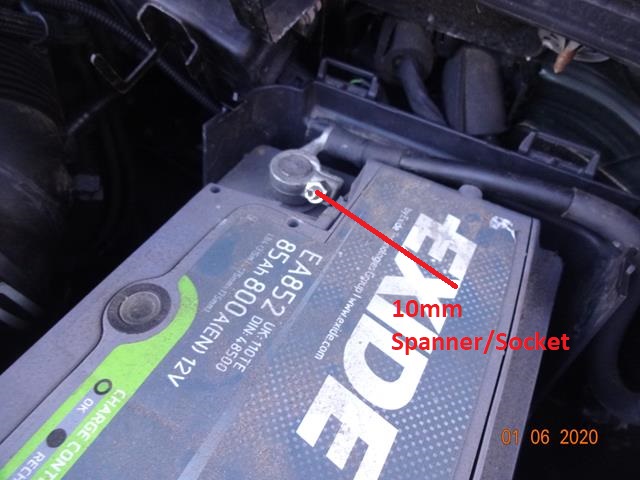
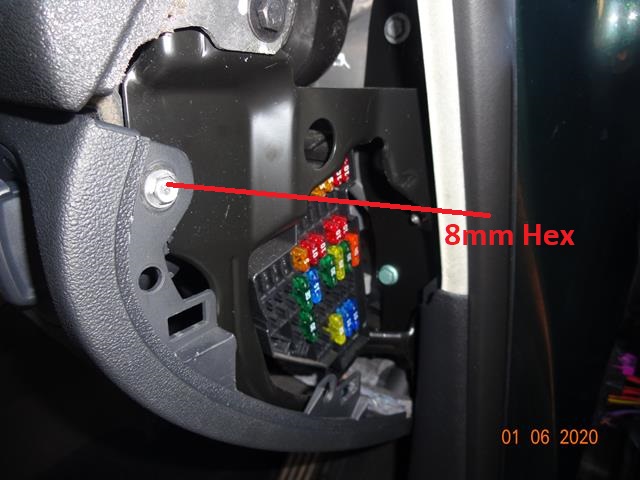
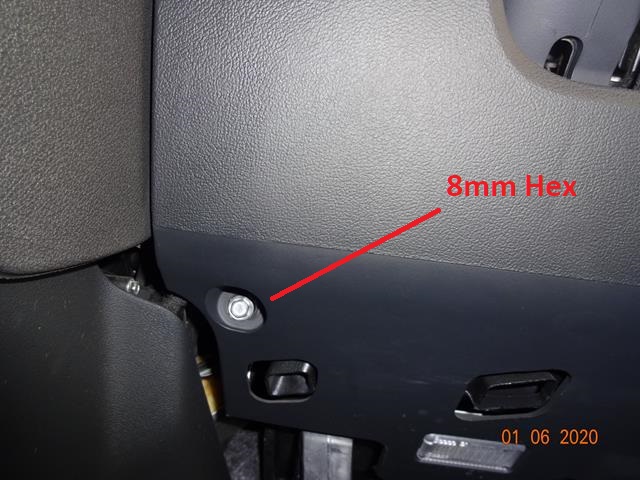
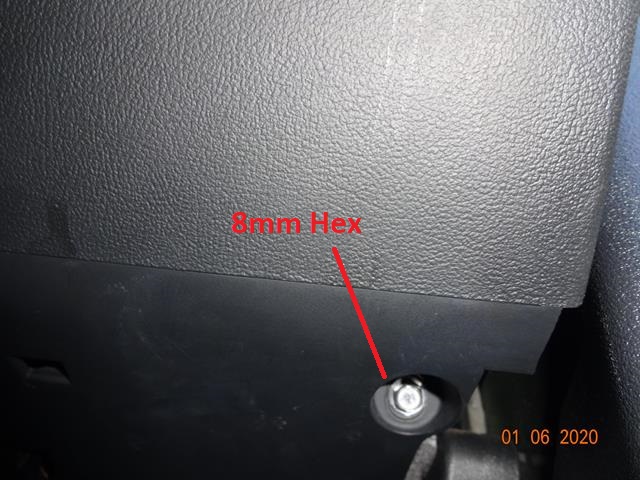
Pop off the fuse panel cover, remove 8mm screw. Fuse panel accessible when you open drivers door side of the dashboard
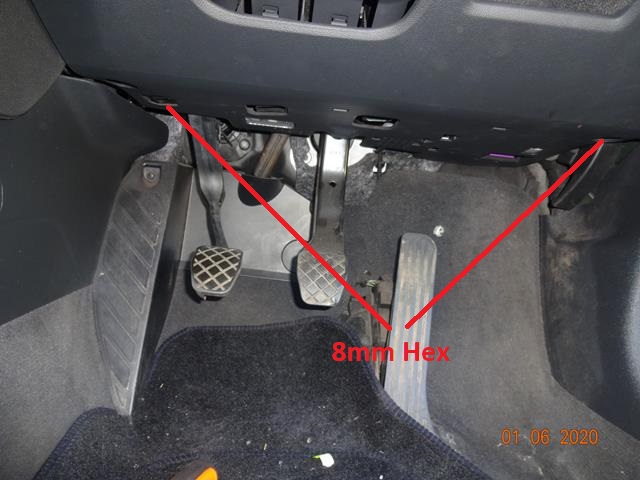
Remove 2 lower 8mm screws on footwell trim and remove (disconnecting the OBD connector, headlight cables, footwell light). You probably don't need to do this if you're careful. I'm clumsy though less for me to break
Remove T25 screws on steering wheel adjustment handle and slide off the handle from the rod
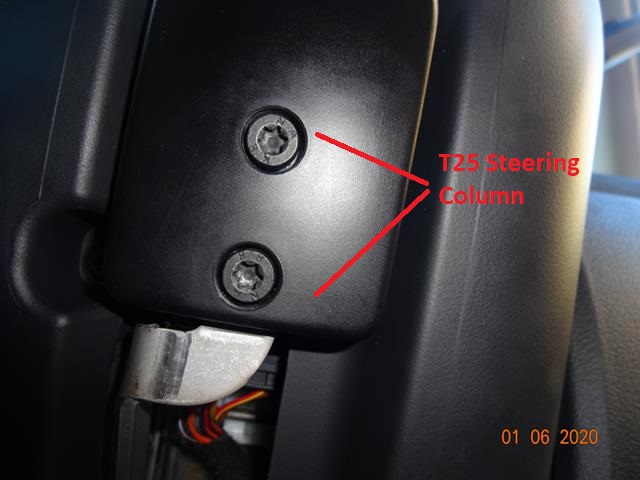
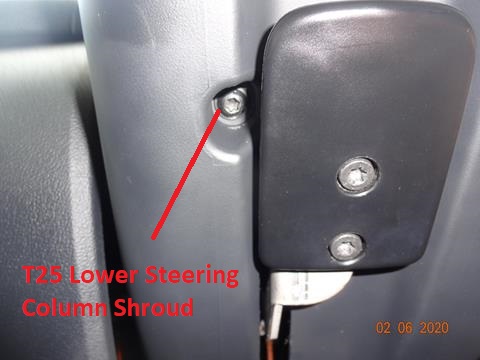
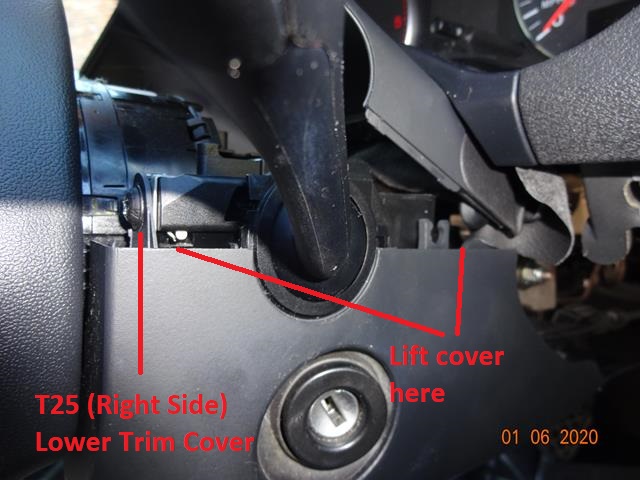
Remove T25 screw on lower steering wheel cover
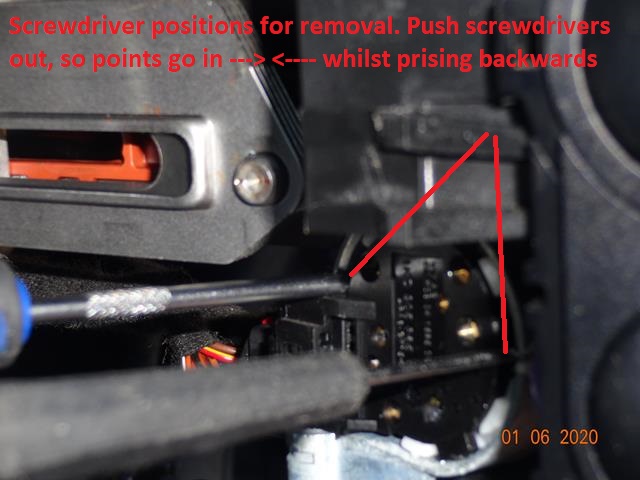
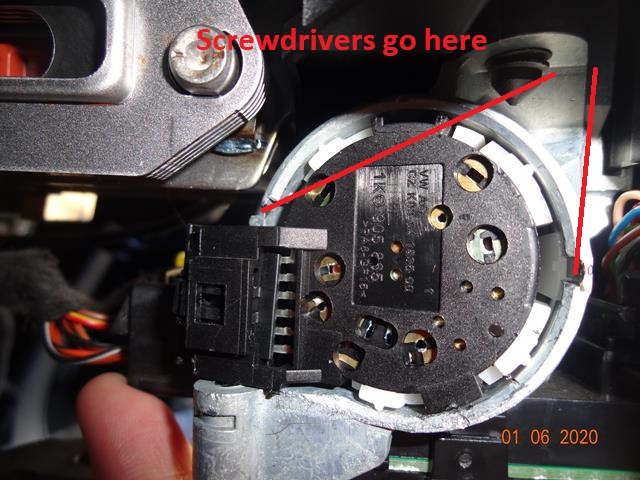
Prise apart the top cover inserting screwdriver / trim removal tool at locations noted
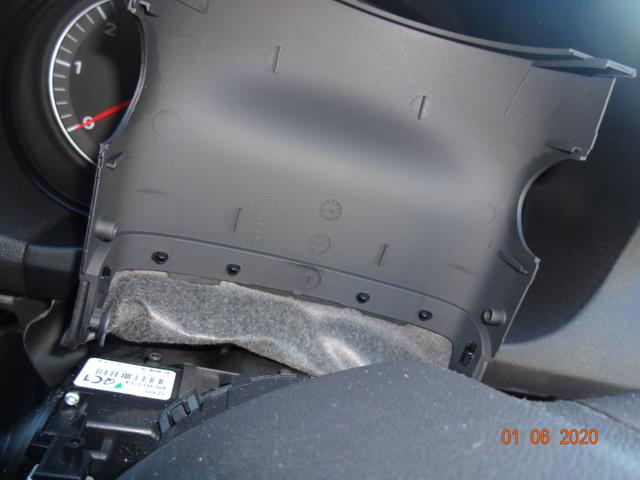
Pull the top cover forward and up
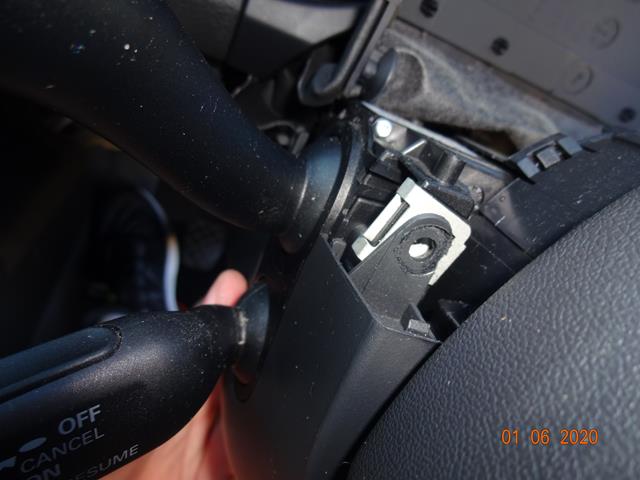
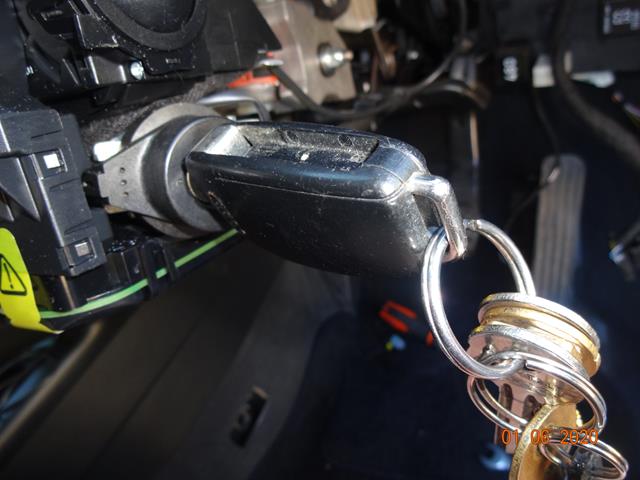
Insert key in ignition, undo steering wheel lock and rotate wheel to give access to T25 torx behind steering wheel. Repeat for the other side
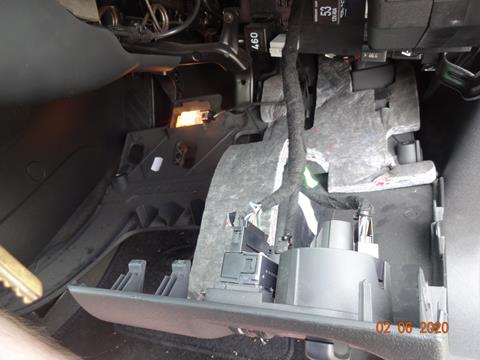
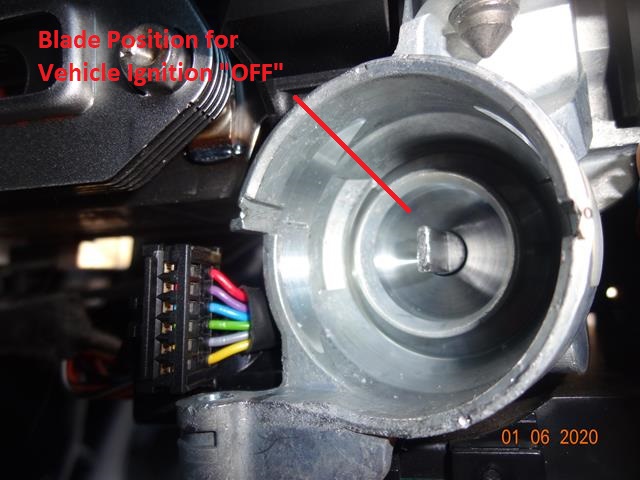
Remove lower cowling exposing access to ignition assembly. Just to clarify the part number on my OEM starter was 1K0905865
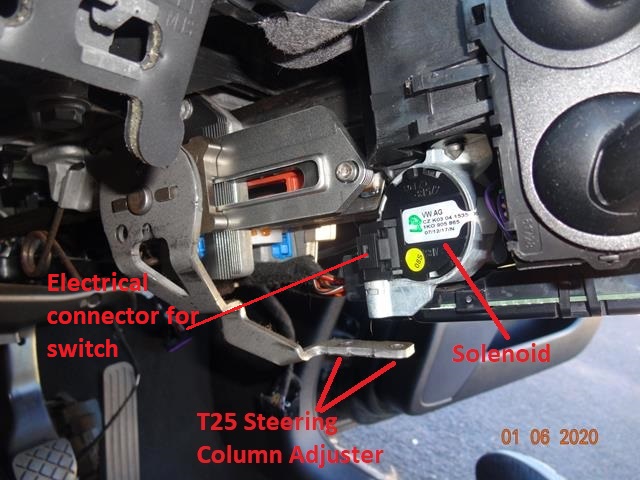
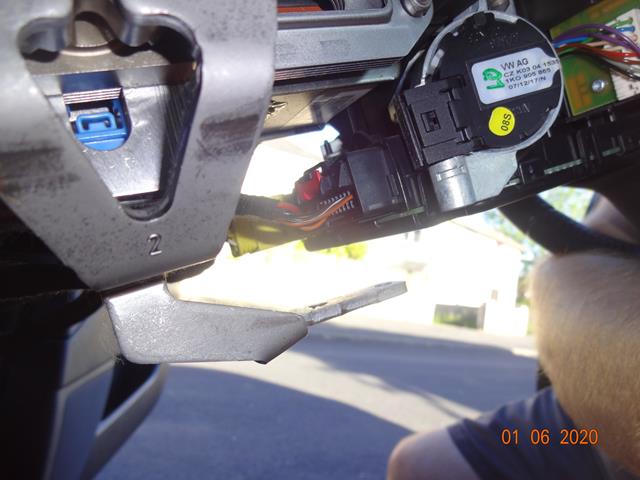
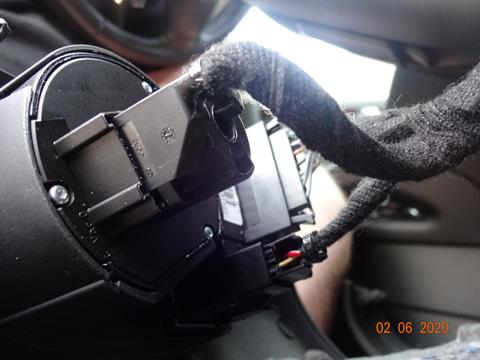
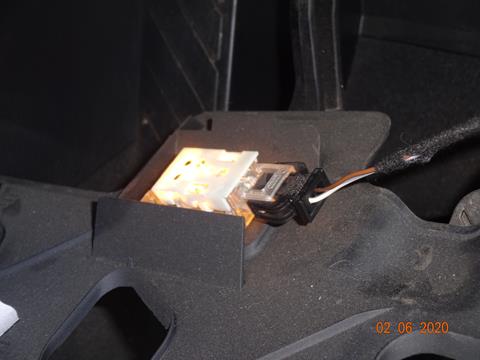
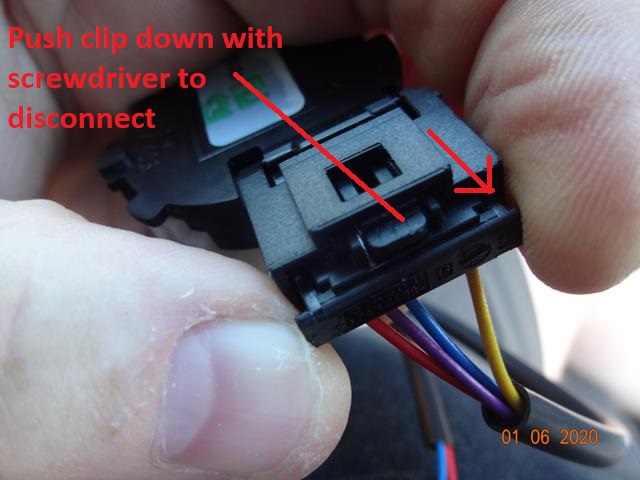
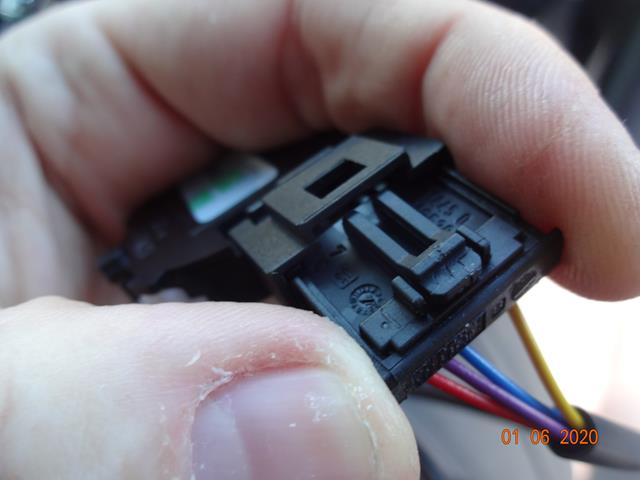
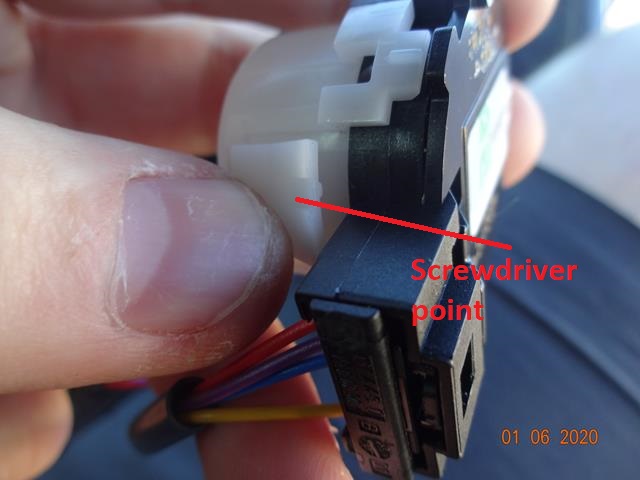
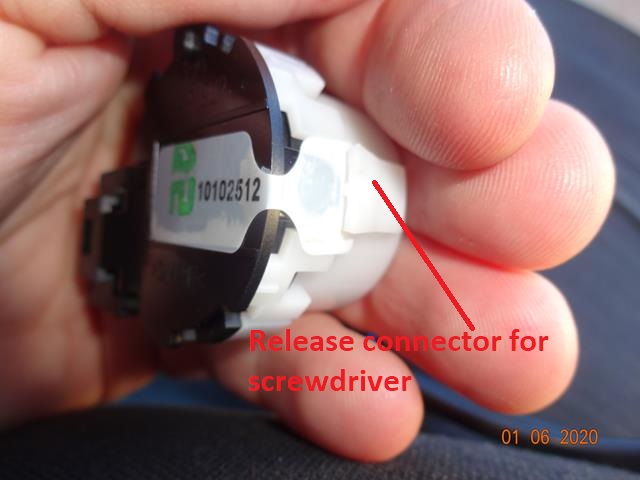
Disconnect electrical connector for switch
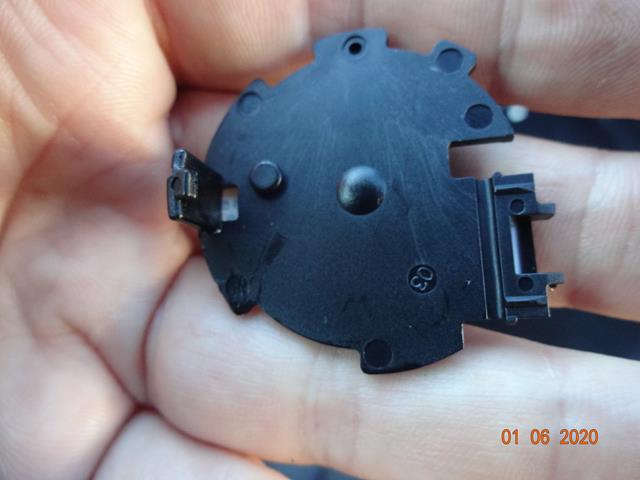
Insert two thin screwdriver blades between assembly, pushing the blades towards each other whilst pushing gently to remove the old one. It doesn't take much force to "pop" it out, it's just a bit awkward. The top cover from the switch actually detaches. You may find it easier when it comes to removal. I should note here, that there's very little you can damage behind the actual starter switch. So you can be a bit rough if needed, just obviously not ham-fisted enough to break the metal (your screwdrivers would more likely break first). You can see in the 2nd picture what is behind it

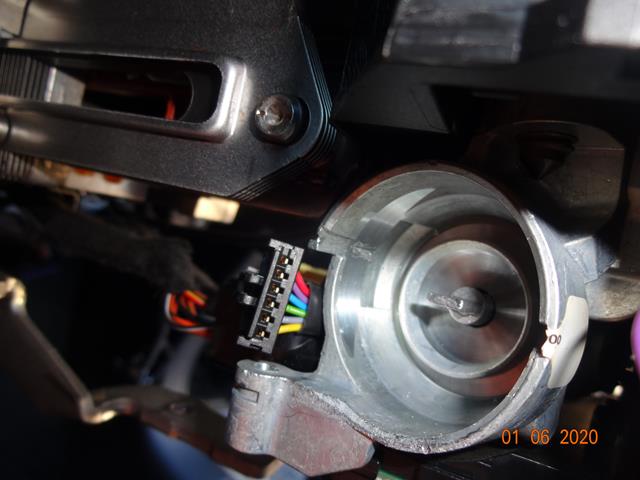
Put keys in the ignition, turn to "ON" position (this is the position before you turn the ignition to start the car), the small bar will be horizontal in position, whilst the keys will be vertical. This will be the fitment position for how to install the switch. As noted at the start, I never replaced the wiring loom. So I have no idea how hard this is, or what the task involves. If you plan on replacing the wiring too, my best suggestion if you get stuck would be try this site. Looking at the articles, the screw what holds it in is attached to the front of the housing underneath the steering wheel. I suspect it's attached under this. It's for a different car, but VAG cars are pretty much similar in the way they're designed and built, so chances are the procedure is the same. It's up to you to research this however. I'm taking no responsbility, I would advise against it. Unless you've confirmed wiring is at fault or it's needed such as to retain/upgrade the steering wheel controls. If I ever get the information to do this. Or end up doing it, I will update the article with further information.

Fit replacement switch and attach connector cabling, make sure it "clicks" when you push it in. If it doesn't, remove wiring and try again, connection needs to be firm.
After install take keys out the ignition. Rettach battery connector. Start car with all covers removed, test equipment.

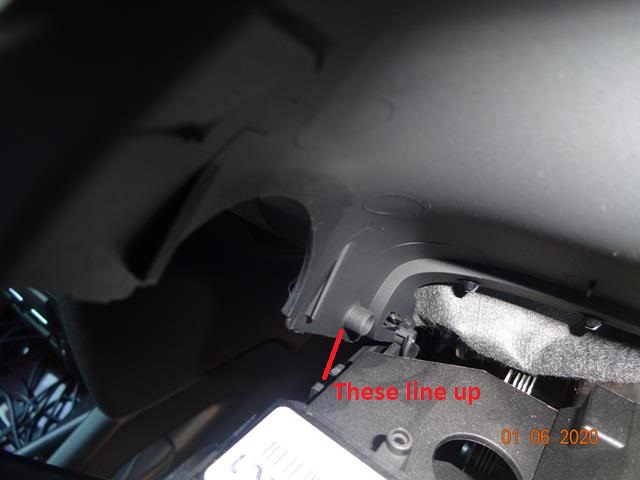
Once completed and fix verified. Reattach all covers reversing above procedure, make sure when attaching the top cover, you align the pegs/notches. The notches go in first, then the pegs. It all connects together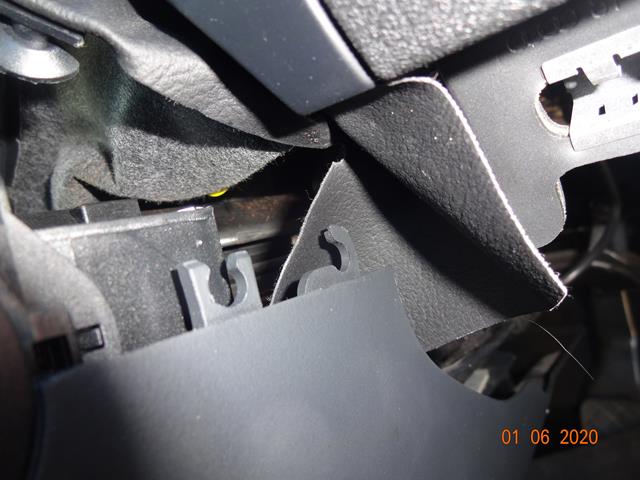

Additional steps after replacing ignition switch
As a quick note, if your steering light doesn't go out. It normally means you haven't calibrated it properly or (Most likely) you have a fault with your brake system (wheel speed sensor for example). The steering control system uses the Brakes for readings. So if there's a fault with those, it won't "recode". Just something to make a note of
- After disconnecting the battery, you will need to reprogram the steering wheel settings, it's done with the following
- Start the engine
- Full steering lock to left and hold for a couple of seconds
- Full steering lock to right and hold for a couple of seconds
- Centre steering wheel and drive (preferably on a straight road)
- The steering wheel light should disappear after driving about 50-100 feet this means it's calibrated
- Clear any fault codes with VCDS afterwards to make sure fix was successful
Just as a note on the Fault Codes. If any fault codes stay, you either need to rectify them or investigate further. I cleared the fault code, but it came back again. This was because of my own stupidity, I cleared the code under Group 46, it also exists in Group 16. Make sure you clear BOTH groups
Did you like this post? Why not read more of my Auto Repair articles. Or visit my blog, and read the other random stuff I talk about.